How To Build Your Own Studio Backdrops: Canvas, Texture Boards & V-Flats

We photographers are a resourceful and industrious lot. We bend the rules and make things work in a pinch better than most. This is perhaps never more evident than when you get a behind-the-scenes look and see the complete picture of how some images get made.
Even some of the most beautiful and iconic images are held together by pins, strings, and glue. You’ll see everything from simple, clever angles to softboxes made out of cardboard, a shower curtain, and a speed light, and you’ll see gaff tape and clamps holding together things that maybe shouldn’t exist at all. Whatever it takes to get the shot!
We’ve all heard the phrase “photos never lie,” but those of us that create them know that isn’t true. Though, you’d never know it by looking at that final image.
I recently challenged myself to create some studio materials and props on a budget. I aimed to create a hand-painted canvas backdrop, two V-flats and two double-sided and heavily textured backdrop boards or “walls.” All are very useful to have around and can be used in countless ways again and again.
To buy any of these things at retail would be quite expensive. You would be hard pressed to find a hand-painted backdrop alone for under $500. I was able to source materials and tools to create all three of these studio props for $400 and put it all together in a weekend.
For less than $400 I was able to create two V-flats, two double-sided textured boards/walls, and a hand-painted backdrop! I saved a ton of money, made something entirely unique, and I had a blast doing it all! It was time and money very well spent. Not to mention, should I wish to take the texture boards or backdrop in a different direction in the future, I already have the tools and even some leftover supplies to alter them again if I wish!
How To Build Your Own Studio Backdrops
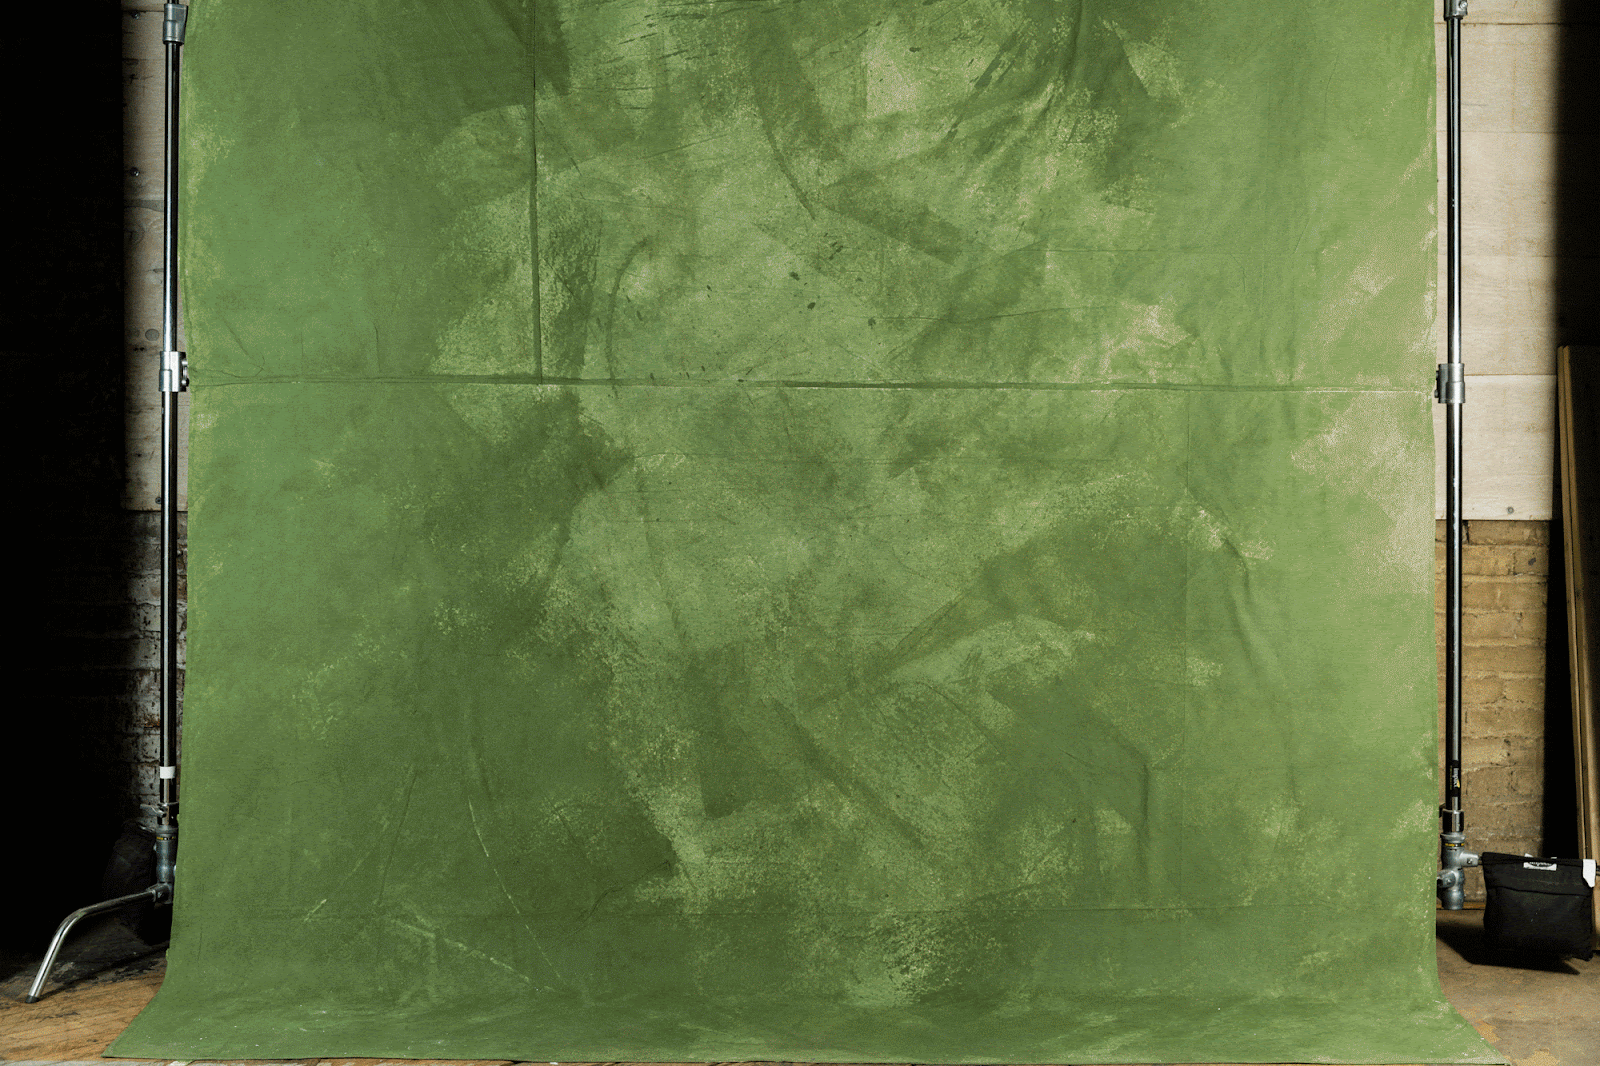
The backdrop is possibly the most versatile of the three items created in this project. It’s the easiest to transport and take on-location, and you could also elect to change the color of it if you wish. If you only made the backdrop you could complete it entirely in one whole day, allow it to dry for another day, and it’s ready to go! It doesn’t require much maintenance, and only get’s better with time, age, and wear. Better still, you could do a 9’ x 12’ backdrop for as little as $50 - $60, depending on the paint, tools, and direction you chose!
I wanted to create a heavily textured backdrop myself, and I’m going to walk you through everything I did so that you know how to make one of your very own!
(I share my studio with my buddy, Steve, pictured below. Join me in thanking Steve for playing model!)

Steve on DIY Backdrop. By Chris Daniels, edited with Mastin Labs Portra 160 preset
These are fantastic, and the best part is that for every board you make you get two sides and two textures!
Unless you have an easy way to move these around, they will most likely stay put where they are because of their size (4’ x 8’). However, if this is something you wanted to travel with, you could elect to do four 4’ x 4’ boards and even do eight different textures.
I chose to leave the boards in their original size, and they stay at my studio for use as walls for portraits and sets. Each side has a unique texture, created with plaster and paint.
You can truly make these your own and cover them with all kinds of different textures. I experimented most with “Quick Spray,” (a powdered plaster that you add water to) and I also used a spray-on knockdown texture.
If you were to make the same ones I did, you could do so for about $70 in materials. You could also choose to cover the boards in wallpaper or other textures if you’d like.


Steve on DIY Texture Boards. By Chris Daniels with Mastin Labs Portra 160 preset

Steve on DIY Texture Board. By Chris Daniels, edited with Mastin Labs PanF preset
The V-Flats are possibly the least versatile tool of the three made, but they help do one thing very very well — shaping light. They are two 4’ x 8’ boards taped together with one side all white and the other all black. Whether you’re using them with strobe or natural lighting, reflecting or blocking light, they’re one of the best tools that you can have around. They are the most straight-forward of the three projects, but taping them together can become quite tricky.

Steve posed between two V-Flats, using the black side to absorb light. By Chris Daniels, edited with Mastin Labs Portra 160 preset

Steve posed between two V-Flats, using the black side to absorb light. By Chris Daniels, edited with Mastin Labs Portra 160 preset
I’ve covered each of these builds in written detail along with supplies lists of materials and tools that I used. I can’t wait to see what you build for yourself, and as always, don’t hesitate to reach out to me for any questions, comments, or just a friendly conversation!

Self Portrait of Chris with DIY Builds. By Chris Daniels, edited with Mastin Labs Portra 160 preset


